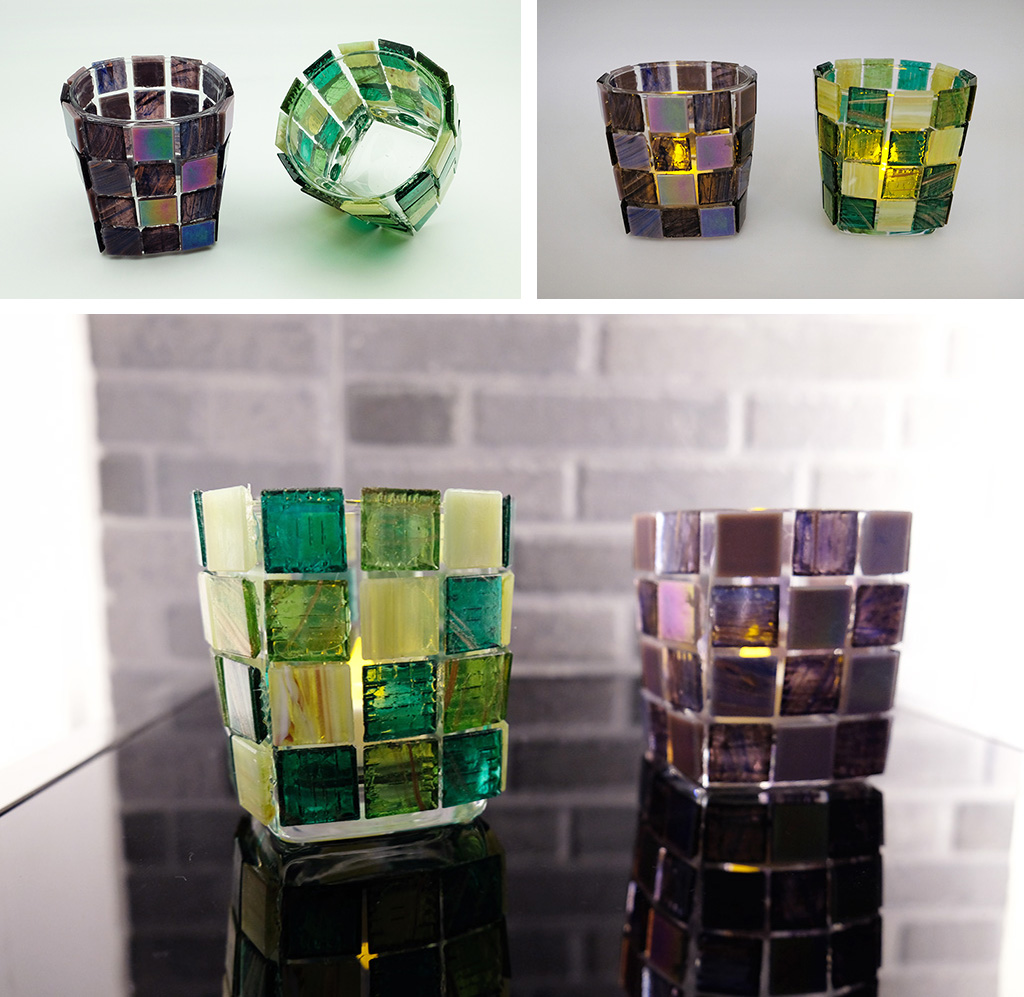
5 STEP DIY MOSAIC TEALIGHT CANDLE HOLDER
LIGHT UP ANY DAY
Who says that you need to have a special occasion to light some candles? Aside from providing light, candles can be used to create a relaxing ambiance in your home. With its cute size and seemingly fragile flame, tealight candles are especially effective in creating that tranquil atmosphere, whether in the kitchen, bathroom, bedroom, or dining area. With this customized Mosaic tealight candle holder, you can turn on that warm and cozy mood any time of the day.
Please note that this DIY is recommended for 13 years old and above due to the handling of mosaic tiles and the tile cutter. Kids must have adult supervision when doing this project. After all, working on this project with other people makes it more fun!
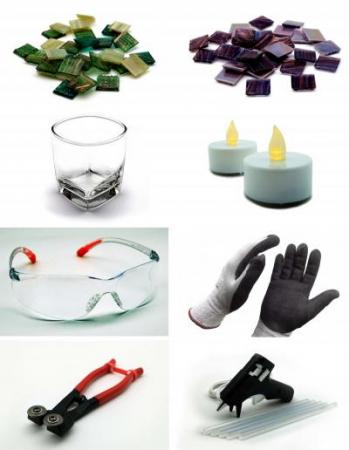
MATERIALS:
2 Sheets of Mosaic Tiles – Emerald and Blush Mosaics from Mozzaico’s Rose Mosaic Collection (the thickness of these chips are perfect for DIYs)
2 pieces Small Drinking Glasses – you can use any small glass at home or purchase an inexpensive small drinking glass
Tea light candles
Clear Protective Glasses – for safety (available in a hardware store)
Cut-resistant gloves – for safety (available in a hardware store)
Mosaic Tile Cutter – this is a heavy duty wheel blade tile cutter which you can buy online
Glue gun and glue sticks – use this to stick the chips on the vase
INSTRUCTIONS:
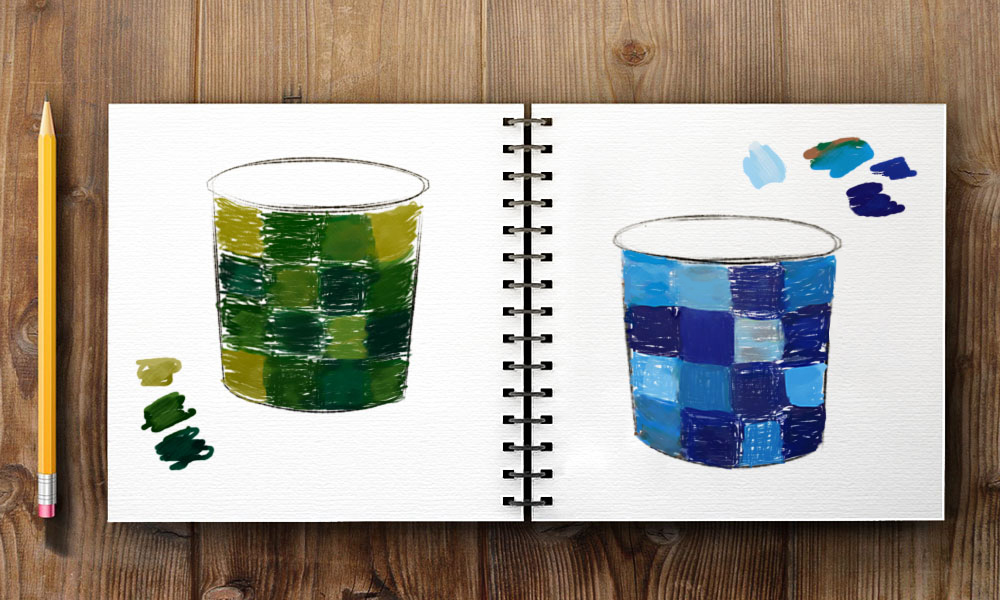
STEP 1
Before you go into the physical tasks, plan first how you want your candle holder to look like. By doing so, you will be efficient and be able to avoid crucial mistakes as you go. A simple draft or sketch is all that you need. Here you can experiment on the pattern and colors that you want to use.
STEP 2
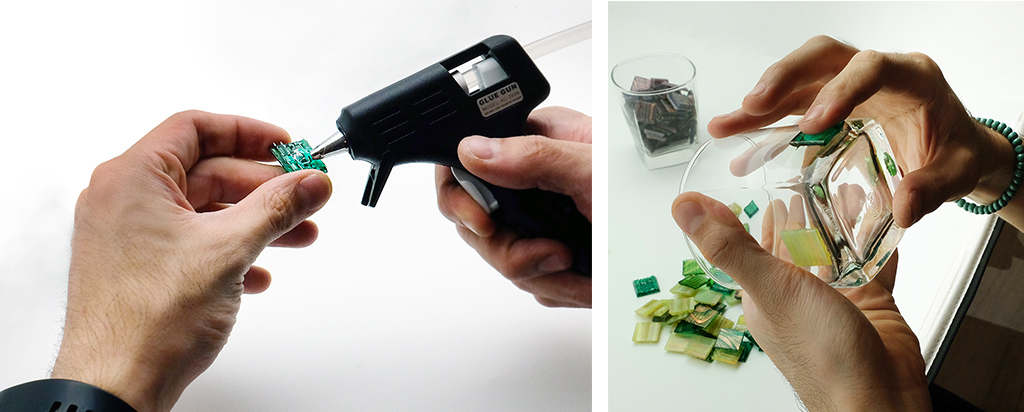
Now that you have your planned design, on we go to the main procedures.
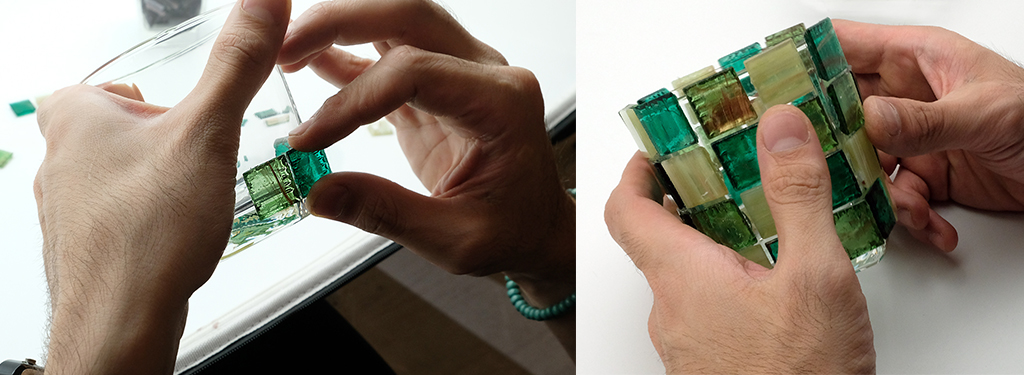
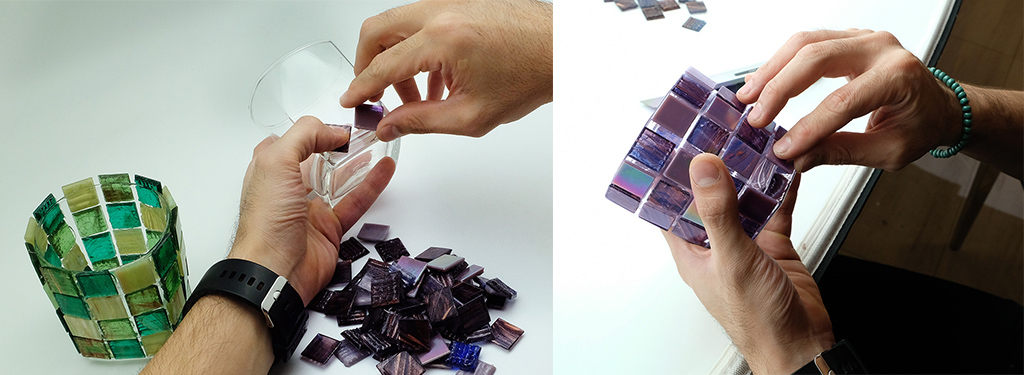
Use the hot glue to stick the tiles on the glass, starting around the base and going up. You don’t need to apply too much glue. Just put a small blob on the middle of your chip, and attach it on the glass surface with just the right amount of pressure. If needed, use the tile cutter to define the shape and size of your tiles.
STEP 3
When you are halfway through decorating the glass, check if you are achieving the design that you want. Make sure that the gaps between the mosaic tiles are uniform.
If you are content with the design that you’re achieving, then continue to glue your chips until you cover the whole outer surface of the glass.
STEP 4
When you are finished with the first glass, continue with the second one. Just repeat the same procedures
STEP 5
Once your glasses are completely covered by mosaic tiles, it’s time to light up your candles! Place the lit candles inside your newly-created candle holders. And voila! Your very own customized Mosaic Tealight Candle Holders are ready to be used.